How it works
The plugin translates the currently rendered webpage content into the selected language. All translations are saved into a database, allowing you to edit them via Translation editor on the Translation Hub.
Setup the Translation Hub:
- Set up and launch Translation Hub using Docker compose.
or
- Set-up and prepare Kubernetes environment.
- Download deployment HELM and configure values.
- Deploy.
- Make available to the outside.
Obtain eTranslation or WEB-T compatible translation provider authorization information:
- Get MT provider access
- Obtain Base URL & API key for a different provider.
Use these credentials on the Translation Hub.
Create an integration and embed the JavaScript plugin on your website:
- Create a Website Translator integration on the Translation Hub.
- Embed the generated JavaScript code into your website.
Translate your website and improve the automated translations:
- Translate your website by going through all pages and selecting every target language from the menu.
- Use Translation editor to improve translated texts. The corrections will instantly appear on your website.
- When new content is added in the original language, re-translate the edited page by selecting every target language from the menu.
First time the content of any page is loaded it will take some time to translate it. The translations will be saved into a database and will load faster the next time.
What are its limitations?
WEB-T Universal does not provide media or email translation.
| Please note: Websites using WEB-T plugin with eTranslation integration enabled must be published and accessible online from eTranslation service. Translation with eTranslation will not work otherwise. |
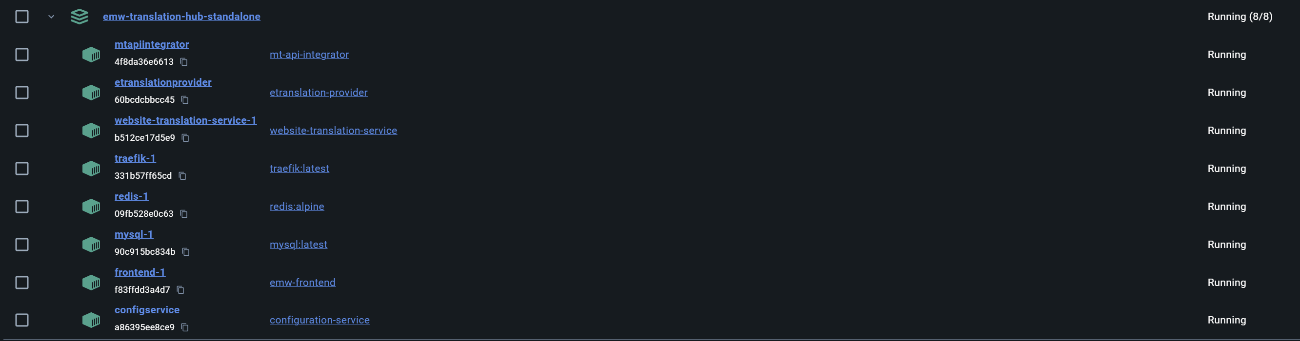
Translation Hub setup using Docker compose
The “WEB-T Translation Hub standalone” repository contains Docker compose file, which includes all the services needed for launch and usage of WEB-T Universal plugin translation hub.
It contains following services:
- Frontend
- Website translation service
- Configuration service
- MT API integrator
- ETranslation Provider
- MySQL database
- Redis
- Traefik proxy
To launch and use this container locally, machine needs Docker Desktop installed on it.
Due to asynchronous workflow of eTranslation API, translation with eTranslation provider will not work unless eTranslation provider component is published online and accessible from eTranslation API via HTTPS. For local setup you can try localhost tunneling solutions (e.g. ngrok, Pagekite) or use Custom provider.
How to launch?
Open terminal in the folder where docker-compose.yaml is located. In the terminal, run the following command:
| docker-compose up |
To check whether container and all services are up and running, it can be done in Docker Desktop.
or in terminal, with command:
| docker ps -a |
If docker build was successful and all services are up and running, then in browser address bar input webt-translation-hub.localhost or open http://webt-translation-hub.localhost/
It should launch functioning WEB-T Translation Hub.
How to use translation with eTranslation provider locally?
With ngrok
First, sign up at https://ngrok.com/. After sign up, on main page you can find multiple instructions about how to use ngrok in various ways. We recommend running ngrok together with other containers using Docker compose, but you can also run it separately.
Run ngrok with Docker compose (https://dashboard.ngrok.com/get-started/setup/docker)
- In docker-compose.yaml file uncomment Configuration__PublicUri in etranslation-provider as well as whole ngrok service.
- Replace YOUR-NGROK-AUTH-TOKEN with your ngrok token.
- If that has not been done yet, in https://dashboard.ngrok.com/cloud-edge/domains generate a static domain (in free plan one such domain can be generated). Format of the domain is *.ngrok-free.app
- Replace YOUR-NGROK-DOMAIN with this generated domain (both in ngrok command and for Configuration__PublicUri) NOTICE! - for Configuration__PublicUri it is important to add https:// in front of your generated domain, for example, https://random-domain.ngrok-free.app/
Run ngrok as a separate process (https://dashboard.ngrok.com/get-started/setup/windows).
- After installing ngrok on windows and adding your auth token, launch this command in windows command prompt ngrok http http://localhost:5079 (eTranslation provider is exposed on port 5079 as defined in docker-compose)
- ngrok will generate a random public url for this local service (format *.ngrok-free.app), copy it.
- In docker-compose.yaml, etranslation-provider there is Configuration__PublicUri, which currently is commented out. Uncomment it and in paste ngrok url in between quotes.
Notes
- Value webt-translation-hub.localhost can be replaced with any domain, locally it should end with .localhost (more about Traefik Routers https://doc.traefik.io/traefik/routing/routers/). Otherwise, Traefik supports any configured domains, as well as can provide TLS (https://doc.traefik.io/traefik/https/overview/).
- website-translation-service and configuration-service use MySQL and following connection string "server=mysql;database=DATABASE_NAME;user=root;password=root" User and Password should be changed if launched to production, since locally it uses simple, default values.
- mysql service is using MYSQL_ROOT_PASSWORD: root. It can also be changed.
- If you wish to build any of services not from gitlab link, but from local repository, it is possible to change any of build -> context links to local folder path. For example, if website-translation-service repository is located in C:/Test/Path/website-translation-service, then respective build context and dockerfile path can be changed to:
build: context: C:/Test/Path/website-translation-service dockerfile: ./WebsiteTranslationService/Dockerfile |
For more advanced deployment setup and configuration, see “Advanced Translation Hub setup”.
Advanced Translation Hub setup
The toolkit consists of several microservices; each component is deployable as a docker container.
Components:
- Frontend (frontend) – Application responsible for all GUI and its operations. It uses Angular, which means this is a Single Page Application
- Translation Hub API (websiteTranslationService) – service for translation management
- Configuration service (configurationService) – service for configurations
- MT API Integrator (mtApiIntegrator) – service for MT services
- eTranslation Provider (eTranslationProxy ) – service for eTranslation implementation
- Redis – DB for eTranslation
- MySQL – DB for APIs
Minimal system requirements
- At least a 2-core x86/x64 CPU (Central Processor Unit)
- 5 GB of RAM (Random Access Memory) or more
- 30 GB of storage or more (for DB)
- Internet access
Supported software versions
- Kubernetes cluster version 1.25+
- Helm 3.5+
- MySQL server 8.0
Kubernetes cluster
You will need kubectl (instructions) and Helm (instructions) installed.
Running WEB-T Translation Hub locally in a dev environment
For testing and development purposes, an easy option to get Kubernetes running is to install Rancher Desktop. Once you have it installed, you will also need to set up an ingress controller. Rancher uses Traefik as the default one, so disable it first by unchecking Enable Traefik from the Kubernetes Settings page. Then deploy the NGINX ingress controller:
helm upgrade --install ingress-nginx ingress-nginx \
--repo https://kubernetes.github.io/ingress-nginx \
--namespace ingress-nginx --create-namespace
MySQL Databases
Setup WEB-T databases on MySQL 8.0 server
| Please note: use separate on-premise or cloud hosted MySQL server or run MySQL server in Kubernetes. MySQL server must be reachable from Kubernetes Pods |
Prepare empty WEB-T databases (DB) and users for databases:
Adjust DB, DB usernames and DB user passwords as needed; you must match the database names in your Helm chart values.yaml file.
-- For configurationService component
CREATE DATABASE IF NOT EXISTS `webt_configuration` CHARACTER SET utf8 COLLATE utf8_unicode_ci;
CREATE USER IF NOT EXISTS 'webt_configuration_user'@'%' IDENTIFIED WITH mysql_native_password BY 'webt_configuration_user_pass';
GRANT ALL PRIVILEGES ON `webt_configuration`.* TO 'webt_configuration_user'@'%';
-- For websiteTranslationService component
CREATE DATABASE IF NOT EXISTS `webt_website_translation` CHARACTER SET utf8 COLLATE utf8_unicode_ci;
CREATE USER IF NOT EXISTS 'webt_website_translation_user'@'%' IDENTIFIED WITH mysql_native_password BY 'webt_website_translation_user_pass';
GRANT ALL PRIVILEGES ON `webt_website_translation`.* TO 'webt_website_translation_user'@'%';
Build WEB-T container images and push containers to your container registry
Read about building docker container images here
| Component | Source code repository | Corresponding Helm chart yaml |
| configurationService | Configuration service | configuration-service.yaml |
| eTranslationProxy | eTranslation provider | translation-proxy-e-translation.yaml |
| frontend | Frontend | frontend.yaml |
| mtApiIntegrator | MT API Integrator | mt-api-integrator.yaml |
| websiteTranslationService | API | website-translation-service.yaml |
Installing the chart
Using the chart from GitHub repo
- Clone this repository
git clone https://code.europa.eu/web-t/web-t-translation-hub-containerable/deploy…;
cd deployment/translation-hub
- Make sure to update values.yaml with corresponding values or create new values file.
The following table lists the configurable parameters of the Translation Hub chart. The current default values can be found in the values.yaml file.
| Parameters | Description |
| basicAuth.enabled | Enable use of basic authentication for the frontend access – set "true" or "false" |
| basicAuth.credentials | [Optional] Set credentials for basic authentication |
| configurationService.dbConnectionString | Configuration Service Database connection string |
| configurationService.image.name | Configuration Service Image name |
| configurationService.image.pullSecret | Configuration Service Image pull secret |
| configurationService.image.repository | Configuration Service Image repository |
| configurationService.image.tag | Configuration Service Image tag |
| eTranslationProxy.image.name | ETranslation Proxy Image name |
| eTranslationProxy.image.pullSecret | ETranslation Proxy Image pull secret |
| eTranslationProxy.image.repository | ETranslation Proxy Image repository |
| eTranslationProxy.image.tag | ETranslation Proxy Image tag |
| frontend.image.name | Frontend Image name |
| frontend.image.pullSecret | Frontend Image pull secret |
| frontend.image.repository | Frontend Image repository |
| frontend.image.tag | Frontend Image tag |
| global.domain | Translation Hub domain name |
| global.eTranslation.email | eTranslation translation recipient email – for testing only, leave empty after testing |
| global.eTranslation.timeout | eTranslation timeout |
| ingress.tlsSecret | Ingress TLS secret name |
| mtApiIntegrator.image.name | MT API Integrator Image name |
| mtApiIntegrator.image.pullSecret | MT API Integrator Image pull secret |
| mtApiIntegrator.image.repository | MT API Integrator Image repository |
| mtApiIntegrator.image.tag | MT API Integrator Image tag |
| websiteTranslationService.dbConnectionString | Website translation service Database connection string |
| websiteTranslationService.image.name | Website translation service Image name |
| websiteTranslationService.image.pullSecret | Website translation service Image pull secret |
| websiteTranslationService.image.repository | Website translation service Image repository |
| websiteTranslationService.image.tag | Website translation service Image tag |
Optional: Configuration for Restricting Access to translation hub website (Basic Authentication):
Credential preparation for Basic Authentication configuration:
If basicAuth.enabled is set to true then user credentials must be configured in values.yaml file.
Example of how to prepare Basic Auth configuration for web-t-user user with password web-t-pwd:
# In Linux terminal execute command:
htpasswd -nb web-t-user web-t-pwd
Command output example:
web-t-user:$apr1$j2PQtFMu$7uEKTHLBdxwAbYKvgdfmh/
# Next, copy part of previous output – the part after username and colon symbol (e.g., part after "web-t-user:") and paste that to second command to get the base64-encoded password hash to use as a password:
printf '$apr1$j2PQtFMu$7uEKTHLBdxwAbYKvgdfmh/' | base64
Command output example, use this for password configuration: JGFwcjEkajJQUXRGTXUkN3VFS1RITEJkeHdBYllLdmdkZm1oLw==
Update configuration in values.yaml file:
basicAuth:
enabled: true
credentials:
- username: web-t-user
password: JGFwcjEkajJQUXRGTXUkN3VFS1RITEJkeHdBYllLdmdkZm1oLw==
# you can add more users if necessary by adding these lines with user prepared user credentials:
- username: user2 # to add another user
password: *pwd2* # tanother users pwd
- Install the chart with the release name translation-hub in web-t namespace.
helm install --create-namespace -n web-t translation-hub . -f values.yaml
| Please note: eTranslation is an online machine translation service provided by the European Commission (EC). eTranslation web service is asynchronous. This means that the client sends a translation request and is notified later when the text snippet is translated. Make sure that the translation hub API domain is correctly exposed to the internet and can receive traffic from eTranslation servers. |
Uninstalling the chart
To uninstall/delete the translation-hub deployment from web-t namespace, run:
helm delete translation-hub --namespace web-t
Delete web-t namespace
kubectl delete namespace web-t
Translation Hub overview
After you have set-up the Translation Hub, open the browser and navigate to the URL where it is located.
On the Translation Hub, you will find:
- Translation Provider – for setting the translation provider authorization information (eTranslation API credentials or Base URL & API key).
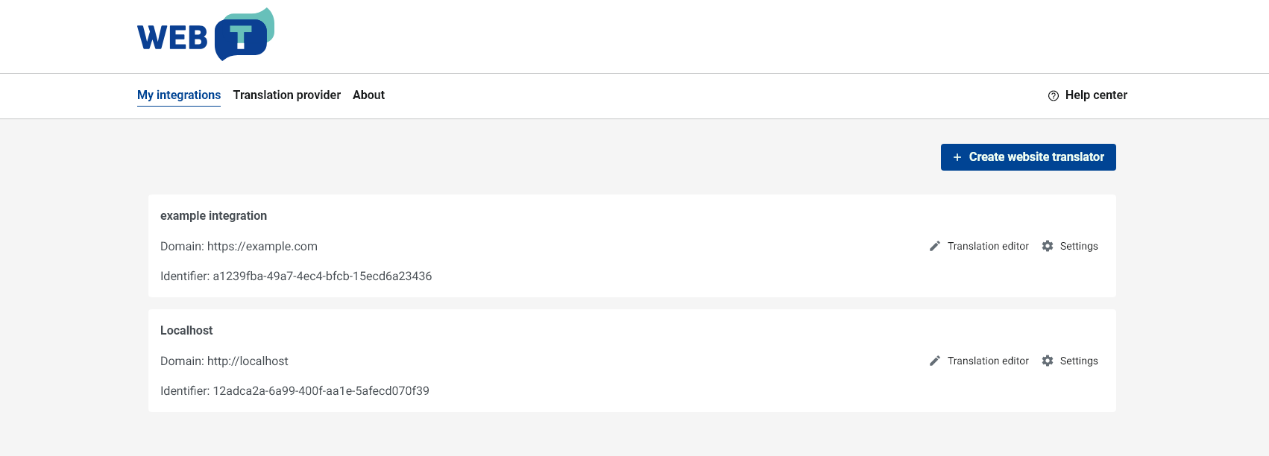
- My integrations – for creating and managing your website integrations. Once you create an integration it appears in the “My integrations” list.
- Translation editor – for managing and editing translations (for each integration separately).
- Settings – for editing languages, machine translation engines and domain access (for each integration separately). This page also includes the generated JavaScript integration code.
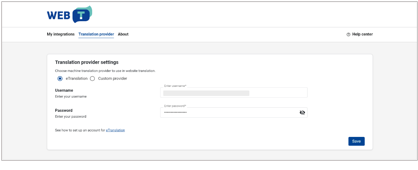
Configure translation provider
Before you continue:
You must have an eTranslation or WEB-T compatible translation provider account.
You have obtained eTranslation API credentials or Base URL & API key from your translation provider.
To configure the MT Provider on the Translation Hub:
- On the Translation Hub, open Translation provider.
- Select MT provider (eTranslation or Custom).
- Enter the required data (eTranslation API credentials or Base URL & API key).
- Click Save.


Website translator integration
Before you continue:
You have deployed the Translation Hub and have access to it.
You have configured the Translation provider.
Integration consists of 2 main steps:
- Creating an integration on the Translation Hub.
- Including the generated JavaScript code into your website.
After you have included the JavaScript code, the language selector will appear on your website, and you can start translating by selecting a language.
|
💡 For most users we recommend following the steps in Integration (Basic). For more advanced use cases, see Integration (Advanced):
|
In this section:
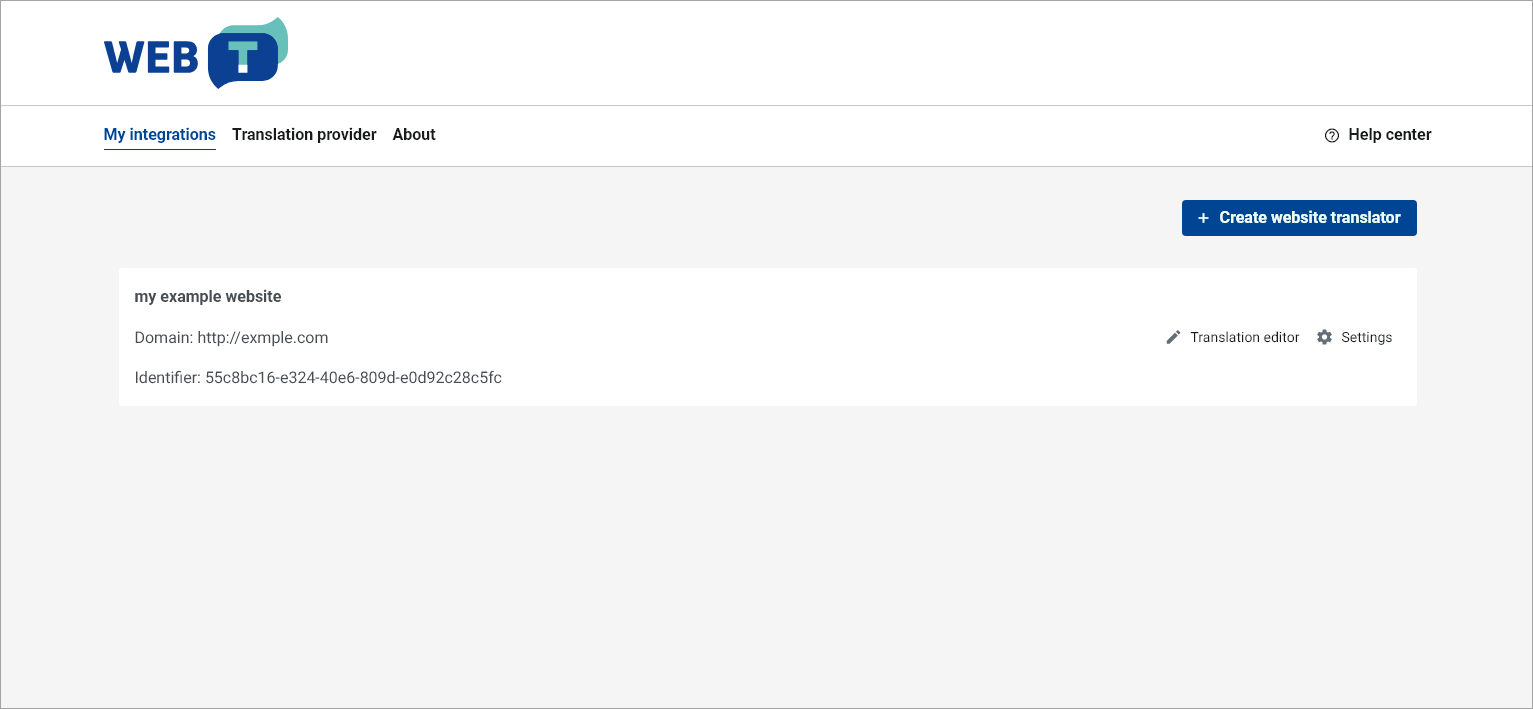
My integrations
“My integrations” lists all of website integrations you have created on the Translation Hub. From this view you can:
-
create new integrations,
-
access the Translation editor for a specific integration,
-
access the Settings of a specific integration,
-
delete integration by opening Settings of a specific integration.

Integration (Basic)
Following the basic integration steps, you will add the default language selector to your website. This section includes an HTML example, that you can try.
The language selector will appear as a dropdown. It will load the available languages automatically and start translation on selecting. The translations will appear on the Translation Hub in Translation editor where you can edit them.

To create a new website integration:
- On the Translation Hub, open My integrations.
- Click +Create website translator.
- Select General setup.
- Fill the form:
- Give your integration a name.
- Add your website domain URL. (https://example.com, https://www.example.com and https://sub.example.com should all be added separately by clicking Add another domain).
- Select your website's original language.
- Select the languages you want your website to be translated into.
- In the generated table, select an MT engine for each language.
- Click Save.

Include the generated JavaScript code into your website
To add the JavaScript plugin to your website:
- On the Translation Hub, open the Settings of the specific integration.
- Open General setup tab.
- Copy the language selector tag and insert it in your website code, where you want the language selector to appear.
- Copy the website translation widget script and insert it at the end of the <body> tag.
- The language selector should appear on your webpage. Reload the page if needed.

Try an example
To create and translate a test page:
- Copy the example below.
- Replace WebsiteTranslator.Options.api.clientId value from the generated code.
- Replace WebsiteTranslator.Options.api.url value to you Translation Hub URL.
- Save the file to your web solution.
- Open the example page in your web browser.
<html lang="en">
<head>
<title>My title</title>
<meta property="og:site_name" content="My site name">
<meta name="description" content="Some site description.">
</head>
<body>
<div class="website-translator"></div>
<p>This will be translated</p>
<p translate="no">This will not be translated</p>
<p lang='ja'>これを訳して</p>
<p>This text is <b>bold</b></p>
<p>This is an example with a <a href="">link</a></p>
</body>
<footer>
<script type="text/javascript" src="https://unpkg.com/@tilde-nlp/website-translator/dist/widget.js"></script>
<script>
// 👇 Change XXXXXXXXXXX to your Client-ID
WebsiteTranslator.Options.api.clientId = "XXXXXXXXXXX";
// 👇 Change XXXXXXXXXXX to your Translation Hub URL
WebsiteTranslator.Options.api.url = "XXXXXXXXXXX";
WebsiteTranslator.Initialize()
</script>
</footer>
</html>
Translated text segments get stored in a database. This means that translating the same page again will be a lot quicker and you can edit translations.
The translations will appear on the Translation Hub in Translation editor where you can edit them.

Integration (Advanced)
Before you continue:
You will need to have some JavaScript knowledge to follow the Advanced integration instructions.
You will need to have access to edit the JavaScript integration embedded into your website.
In this section:
- Setup language selector
- Customize translation progress bar
- Integrate in an already multilingual website
- Full configuration options list
Setup language selector
Configure the default language selector
Before you continue:
You have followed the steps of Basic integration. The JavaScript plugin is embedded into your website.
Language selector can be displayed as a dropdown or a list of buttons that can be styled by CSS to further match your style. It will load the available languages automatically and start translation on selecting.
Add an element with class="website-translator" to your page. See: Try an example .
Setting WebsiteTranslator.Options.ui.layout="menu" will display the language selector as a dropdown menu. It is the default appearance.

The website translator’s language selector can be displayed as a list of buttons setting WebsiteTranslator.Options.ui.layout="list".


Use a custom language selector
Before you continue:
You have created an integration on the Translation Hub.
The default language selector (dropdown or list of buttons) doesn’t fit your needs.
Initialize
Initializes Website Translator - language select, fetches available MT systems. If there is lang parameter in URL, it will translate to language that is provided in parameter value. If there is no lang parameter and current source language is the same as last time when Tilde Website Translator was used, then it will translate to last translated target language.
Normally Initialize should be issued only once, but further calls will reinitialize language select. Consider this when your page changes DOM including language selector.
// Configure your personal access key
WebsiteTranslator.Options.api.clientId = 'x-xxxxxxxx-xxxx-xx'
// Initialize
await WebsiteTranslator.Initialize()
Start translation and wait until finished
Translate page to specific language. If you call Translate even if previous translation is not finished, it will cancel current translation, restore web page in original language and start new translation in specified language - same as to issue Cancel and restore translation and start new translation with Translate.
// You can call next translation even when previous is not finished
WebsiteTranslator.Translate("lt").then(function(translationFinish){
// You can wait when page is translated
Promise.all(translationFinish).then(function(){
console.log("Translation is complete")
})
})
When page is translated, web page url lang parameter is changed to translated language or added if it does not exist.
For example: https://example.com/ -> https://example.com/?lang=lt If page translation is restored, then lang parameter is set to source language.
Cancel translation
Restores page in Source language.
WebsiteTranslator.CancelAndRestore();Translate with given language
WebsiteTranslator.Translate("hu");Get current language
Returns language code for web page. Value can be also SourceLanguage. This can be used to programmatically read web page language.
WebsiteTranslator.CurrentLanguageGet available languages and machine translation systems
Returns available languages and systems. Can be used to create custom language selector or language selection using JavaScript translation API.
WebsiteTranslator.GetTargetLanguages()Customize translation progress bar
Translation progress bar can be displayed at the top or bottom of the page or hidden completely. You will need to edit the JavaScript integration code on your website to change it.
Change display position
To change display position, you will have to set it from JavaScript.
Add the following line to the integration code:
WebsiteTranslator.Options.ui.toolbarPosition = “top”or
WebsiteTranslator.Options.ui.toolbarPosition = “bottom”Hide translation progress bar
Website visitors won’t see the translation progress bar and be able to revert the page to the original language by clicking the restore link.
Add the following line to the integration code:
WebsiteTranslator.Options.ui.headless=trueIntegrate in an already multilingual website
Use machine translation to make an already multilingual website available in more languages.
Specify the languages of your webpage that already have the translation embedded and machine translation should not be carried out. Configure the thirdPartyTranslationLanguages option, if we have German and French versions of the English pages:
WebsiteTranslator.Options .translation.thirdPartyTranslationLanguages = ['de', 'fr']Full example:
<!DOCTYPE html>
<head>
<script type="text/javascript" src="https://unpkg.com/@tilde-nlp/website-translator/dist/widget.js"></script></head>
<body>
<div class="website-translator"></div>
<p>This is an example</p>
</body>
<footer>
<script>
// 👇 Change XXXXXXXXXXX to your Client-ID
WebsiteTranslator.Options.api.clientId = "XXXXXXXXXXX";
// 👇 Change XXXXXXXXXXX to your Translation Hub URL
WebsiteTranslator.Options.api.url = "XXXXXXXXXXX";
// Specify embedded languages of your webpage that has translation already
var thirdPartyLanguages = ["de", "fr", "sv"];
WebsiteTranslator.Options.translation.thirdPartyTranslationLanguages = thirdPartyLanguages;
// Set language of the webpage that is currently rendered. Example shows how to get language code from document lang attribute.
WebsiteTranslator.Options.currentLanguage = document.documentElement.getAttribute('lang')
// Add custom logic to use embedded translations instead of machine translation
WebsiteTranslator.Options.translation.onLanguageSelected = function (selectedLanguage) {
return new Promise(function (resolve) {
let translationHandled = false
console.info('Language selected: ' + selectedLanguage)
// Check if custom action must be perform to open embedded translation bypassing machine translation process
if (WebsiteTranslator.Options.translation.thirdPartyTranslationLanguages.includes(selectedLanguage)) {
translationHandled = true
if (WebsiteTranslator.Options.currentLanguage !== selectedLanguage) {
console.info('Redirecting to embedded language version of the page')
// Add your own logic on how to transform URL of current language to URL of selected target language
// or other necessary actions.
// Note. This replacement logic is to transform http://example.com/page_en.html to http://example.com/page_de.html
// and vice versa.
window.location.href = window.location.href.replace(/page_\w+/, 'page_' + selectedLanguage)
// For example, for page https://example.com/en/news to transform to https://example.com/de/news
// window.location.href = window.location.href.replace(/example.com\/\w+/, "/example.com/" + selectedLanguage)
}
}
resolve(translationHandled)
})
}
// Initialize and run translations
WebsiteTranslator.Initialize()
</script>
</footer>
</html>
Full configuration options list
Section contains a full list of plugin’s configuration options, that you can set through JavaScript.
Language
The widget determines target language automatically if the webpage uses lang parameter in URL query.
It supports ISO 639-1 language codes with optional ISO 3166-1 alpha-2 country codes. If language is not found with specified country code, then widget checks if language without country code is available.
WebsiteTranslator.Options.currentLanguage
Type: String
Default: null
Current web page language (if the web page is already pre-translated). The language in which the website has been translated. When currentLanguage is not equal to source language, selecting language to translate, Website Translator will try to get page in language by calling translation.onLanguageSelected(language)
Debug mode
WebsiteTranslator.Options.debug
Type: Boolean
Default: false
Enable verbose logging in console.
Translation API options
WebsiteTranslator.Options.api.clientId
Type: String
Default: null
Authorization key which allows Website Translator to access translation API Required.
Translation options
WebsiteTranslator.Options.translation.autoTranslate
Type: Boolean
Default: true
Save last translation target language and on next page load, automatically translate to it.
If browser url contains lang parameter in url, Website Translator will use it for translation. Otherwise, if lang parameter is not available, saved language will be used.
WebsiteTranslator.Options.translation.translateOnlyAllowedTags
Type: Boolean
Default: false
Translate only tags and their children which have translate="yes" attribute
WebsiteTranslator.Options.translation.translateAttributes
Type: Boolean
Default: true
Translate HTML attributes.
WebsiteTranslator.Options.translation.onLanguageSelected
Type: Function
Default: () => Promise.resolve(false)Custom actions on selecting languages. This function if implemented should return Boolean -> true when Language must be Translated with Website Translator, false otherwise.
WebsiteTranslator.Options.translation.thirdPartyTranslationLanguages
Type: Array<string>
Default: []
Define languages which are supposed to be translated with third party.
UI options
WebsiteTranslator.Options.ui.headless
Type: Boolean
Default: false
Hide MT toolbar with translation progress.
WebsiteTranslator.Options.ui.tooltipShowDelay
Type: Number
Default: 500
How much time to wait after user is started to hover translation to show suggestion popup (in ms)
WebsiteTranslator.Options.ui.toolbarPosition
Type: String
Default: bottom
Where toolbar is positioned. Values can be:
- "top" - Show translation toolbar at the top of the page
- "bottom" - Show translation toolbar at the bottom of the page
WebsiteTranslator.Options.ui.mainContentElement
Type: HTMLElement
Default: null
Main container HTMLElement for web page that contains all scrollable content.
WebsiteTranslator.Options.ui.showPopup
Type: Boolean
Default: true
Show or hide translation popup Also when disabled, highlight for translated sentences won't be visible.
WebsiteTranslator.Options.ui.showLanguagesInNativeLanguage
Type: Boolean
Default: false
Show languages in native language in language selector.
WebsiteTranslator.Options.ui.translate
Type: String
Default: source
Translate UI, values can be:
- source - Show UI in source language
- target - Show UI in target language
WebsiteTranslator.Options.ui.showTranslationControls
Type: Boolean
Default: true
Show or hide "restore" and "cancel" translation buttons on UI.
WebsiteTranslator.Options.ui.layout
Type: String
Default: menu
Change display mode of the language selection in UI, values can be:
- "menu" - Show available languages in select.
- "list" - Show available languages as list items.
- null - Hide language selector.
Edit existing integration
To change and add new languages or update the domains:
- On the Translation Hub, open My integrations.
- In the list of integrations, find the one you want to edit.
- Click Settings.
- On the General setup tab, scroll down to Website translator settings.
- Make your changes and click Save changes.
If you have your website open, you will need to reload the page (Ctrl+F5) to see the changes.


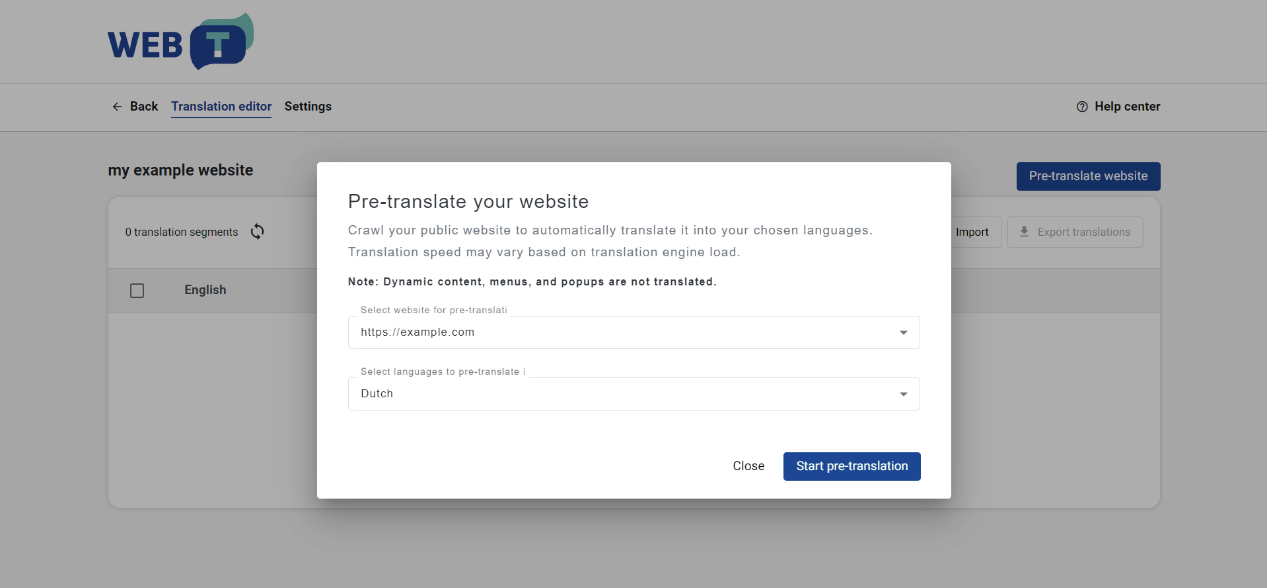
Pre-translate website content
The website translator will crawl your website to obtain a list of URLs for translation. It will then automatically translate these URLs into the selected languages. Please ensure that your website is publicly accessible, or accessible from the same internal environment as the Translation Hub. The translation speed may vary depending on the load of the translation engine and the translation provider.
Dynamic content, menus, and popups are not pre-translated. To translate such content, navigate to the desired page of your website, manually select the language from the language switcher, and then open the menu, popup, form, etc.
To pre-translate a website:
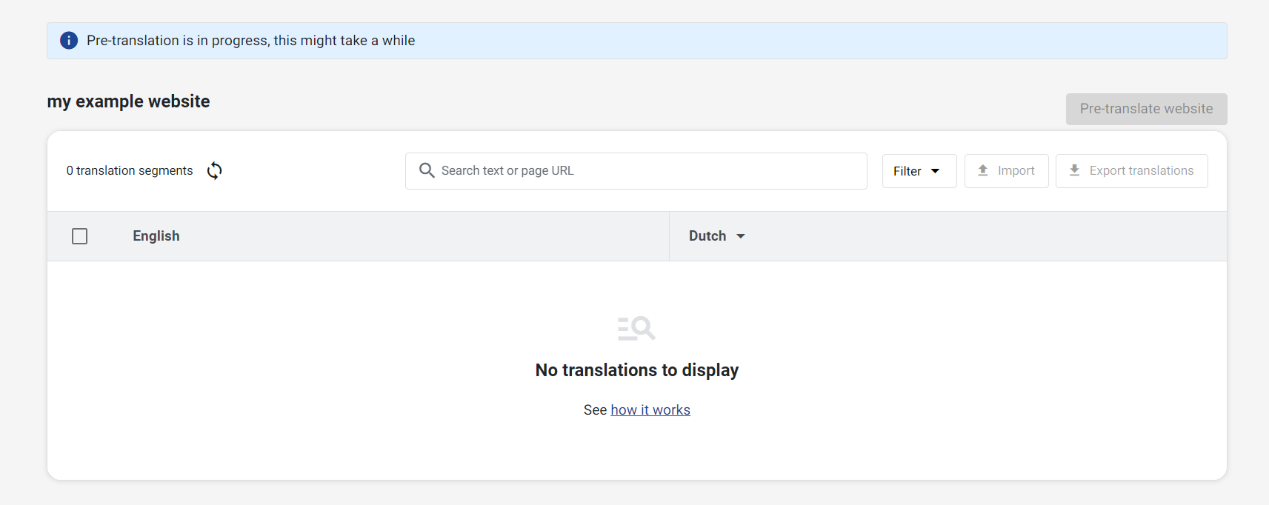
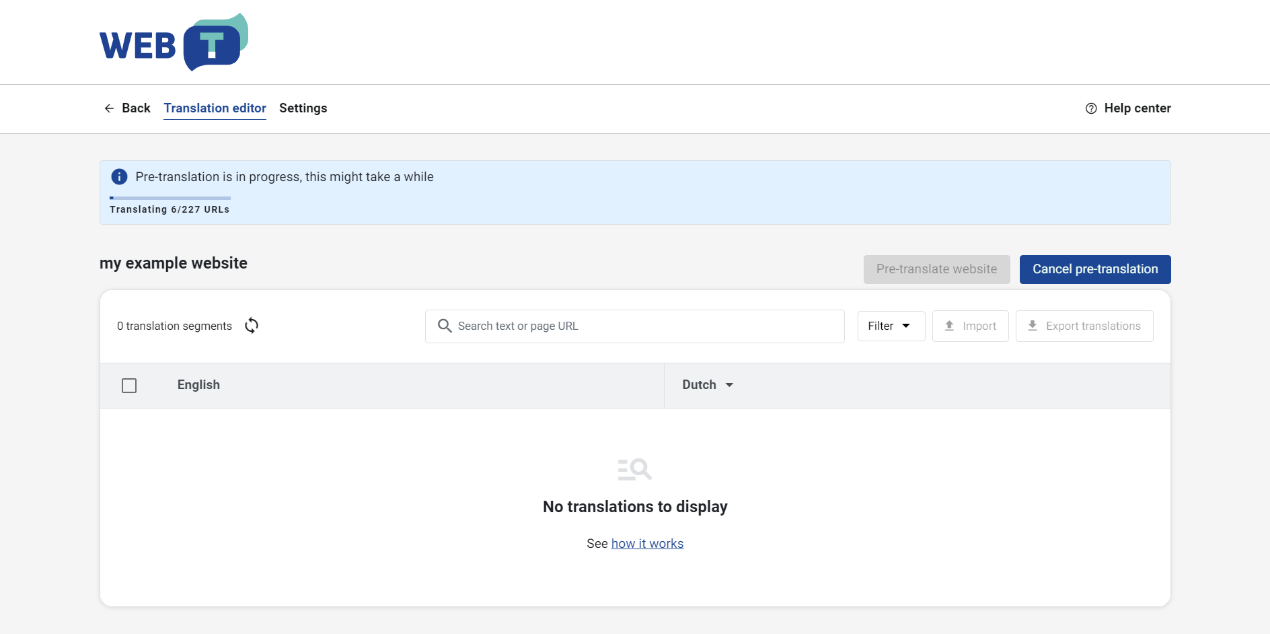
- Open the “Translation editor” and click “Pre-translate website”.
- Select the website domain from the dropdown.
- Choose the desired language(s).
- Click “Start pre-translation”.
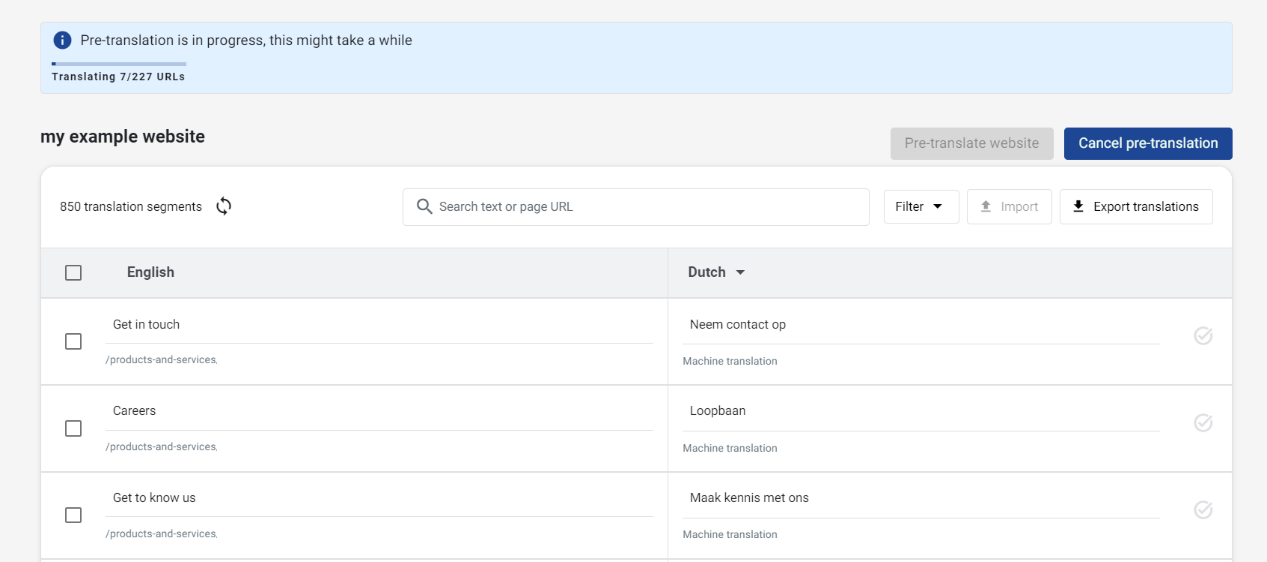
- A pre-translation notice will be displayed while the process is ongoing. You can refresh the translation editor table to view the translated segments.
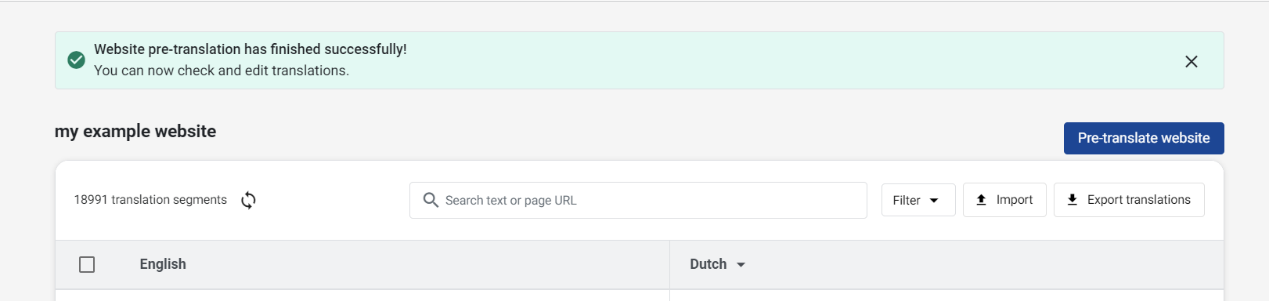
- Once pre-translation is completed success message will be displayed.
- Upon completion of the pre-translation, a success message will be displayed.

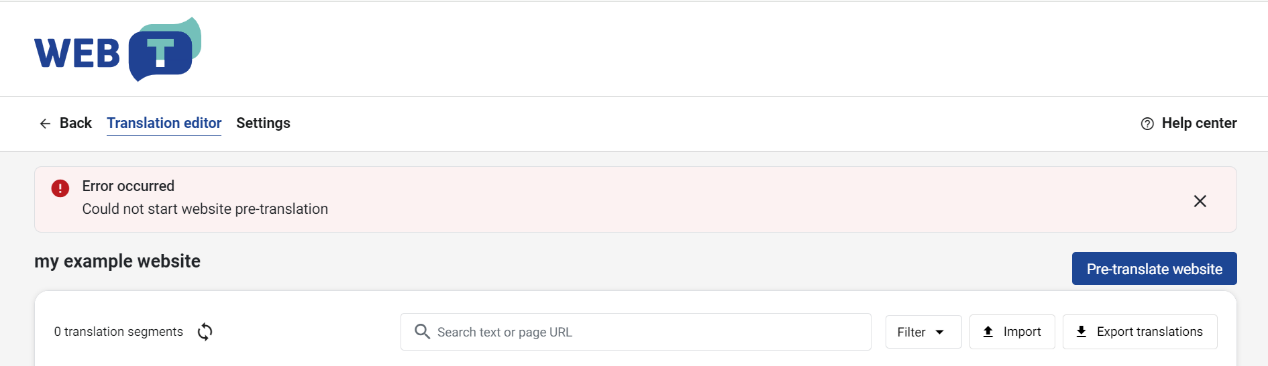
If pre-translation can’t access your website an error will be displayed:
Manage translations
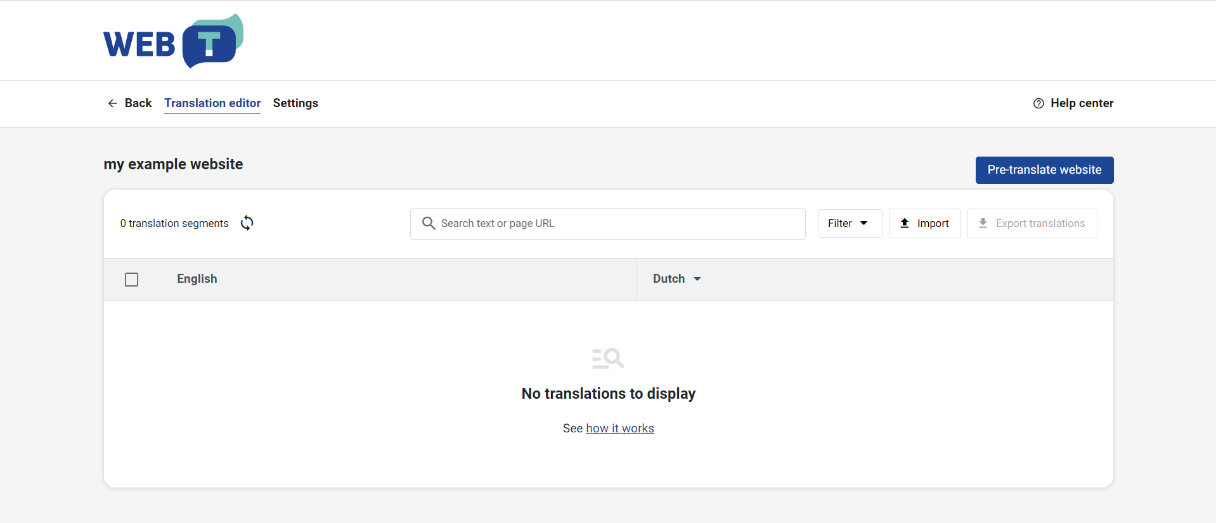
View, edit and delete translations on the Translation Hub. Translate your webpage with the plugin for the translations to appear, refresh the Translation editor table to see new translations.
Edit translation
Translations may need a bit of tweaking, or you might want to replace them with manual translations.

To edit translation:
- In the table of translations, find the translation.
- Click on the row.
- Edit the translation.
- Click Save.
- The translation will be updated and marked as "confirmed" in the database.
HTML tags in the source and translation are displayed as numbered blocks. The colouring and numbers let you follow the order and match the opening and closing tags. Translation must contain all the tags from the source.
Missing and mismatched tag errors will be displayed under the segment. All the tags from the original segment must be present in the translation.
Tags can be dragged to reorder or deleted and inserted by clicking on them under the segment.

Confirm translation
To confirm a translation:
- In the table of translations, find the translation.
- Click the “✔️” checkmark at the end of the row.
The translation in the database will be marked as “Confirmed”. When saving edits made to machine translation the status is automatically set to “Confirmed”. Machine translations not marked as “Confirmed” are still used in the translation. This feature is meant to help keep track of translations that should be reviewed.

Delete translations
To delete a translation:
- In the table of translations, find the translation.
- Click the checkbox at the start of the row.
- Click Delete.

Delete translations having a certain target language
You have decided to remove a certain language from your website and want to delete the saved translations.
To delete all matching translations:
- In the table of translations, select the target language from the drop-down menu.
- At the start of the table header row, click the checkbox.
- Click Delete.
- Repeat until all translations are deleted.
Delete translations having a certain URL
You have decided to remove a certain page from your website and want to delete the saved translations.
To delete all matching translations:
- Filter the translations by URL.
- Repeat the steps from Delete translations having a certain target language for every language.
Delete all translations
Repeat the steps from Delete translations having a certain target language for every language. Or delete the whole Website translator integration.
Filter translations
Filter the translations table to:
- Find translations or source text with matching words or phrases.
- See only the translations you have not confirmed.
- Find translations belonging to a certain page.
- See only SEO translations.
Filter by status or translation type
To filter by translation type:
- Above the translations table, open the filter drop-down menu.
- Select Machine translation or Manually edited.
To filter by translation status:
- Above the translations table, open the filter drop-down menu.
- Select Unconfirmed or Confirmed.
Filter by content type
To see only the SEO meta tag translations:
- Above the translations table, open the filter drop-down menu.
- Select Text or Meta (SEO).

Filter by text
The text is searched in both original language segments and translations.
To filter the table by source or target text:
- In the search field, type the word or phrase.
- Press Enter.

Filter by URL
The table can be filtered by:
- full url of the page, for example: https://www.example.com/pages/my-page, www.example.com/pages/my-page
- partial url, for example: /pages/my-page
To filter the table by source or target text:
- In the search field, type the url.
- Press Enter.

SEO tags
SEO meta tags are translated by the plugin like any other text and appear in the Translation editor table. Translations are labelled with “SEO attribute:..”, found right under the page URL.
Filter the table by Content type to see only the SEO content.

Export translations
Website translations can be exported to an xliff file for backup or translation post-editing in other CAT tools or localization platforms.
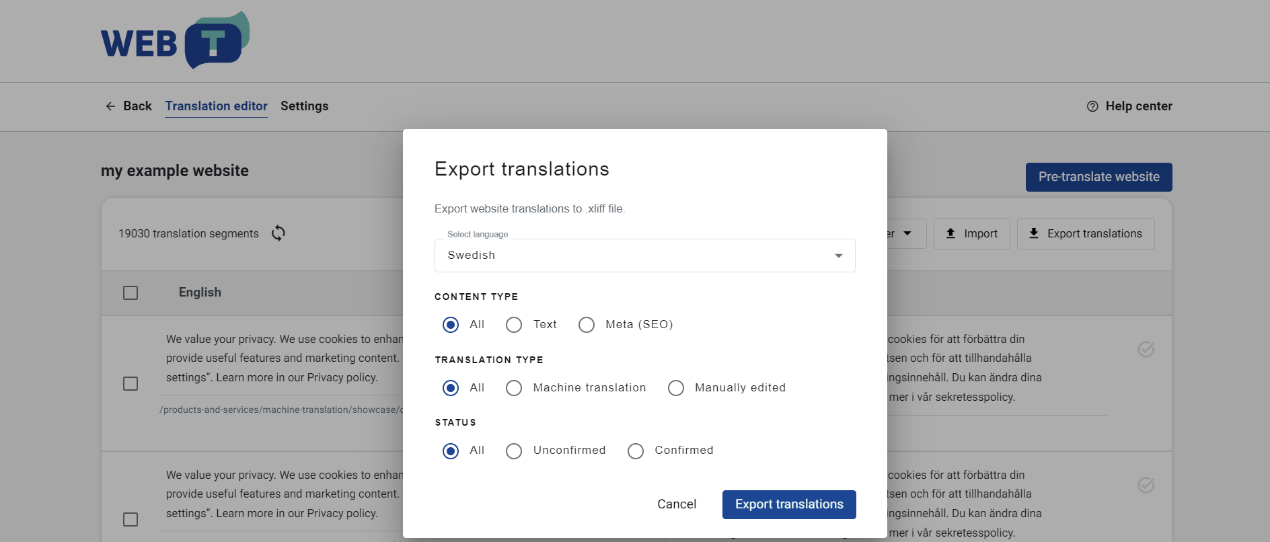
To export translations:
- Open the “Translation editor” and click “Export translations”.
- Select the language.
- Select the content type. You can export all translations or select translations by content type (all, text, meta SEO), translation type (all, machine translation, manually edited) or status (all, confirmed, unconfirmed).
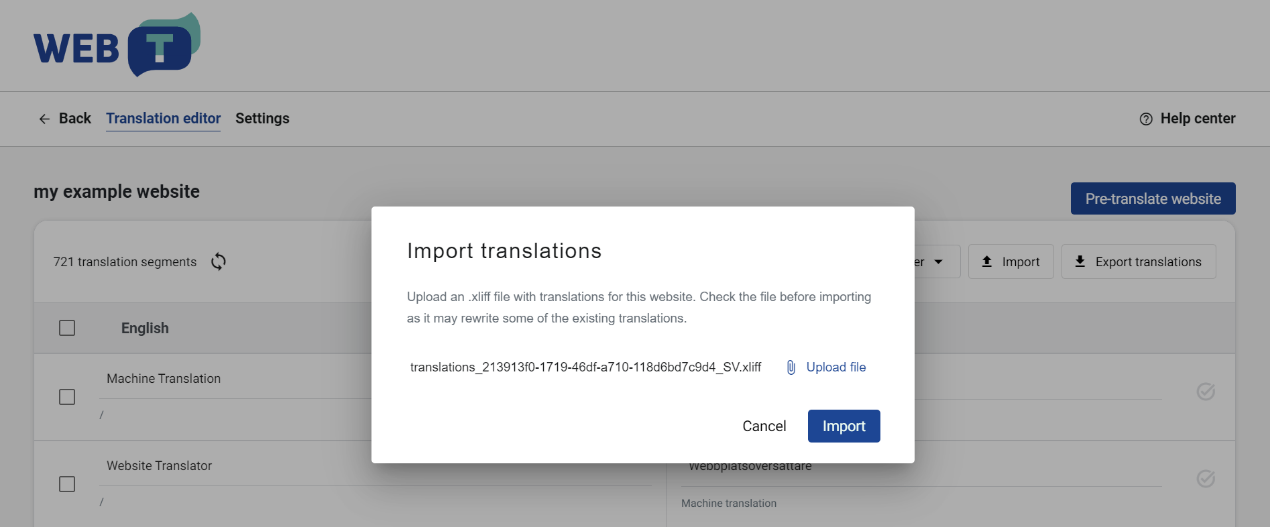
Import translations
Website translations can be imported from an xliff file after translation post-editing in other CAT tools or localization platforms.
To import translations:
- Open the “Translation editor” and click “Import translations”.
- Upload the xliff file with translations and click “Import”.
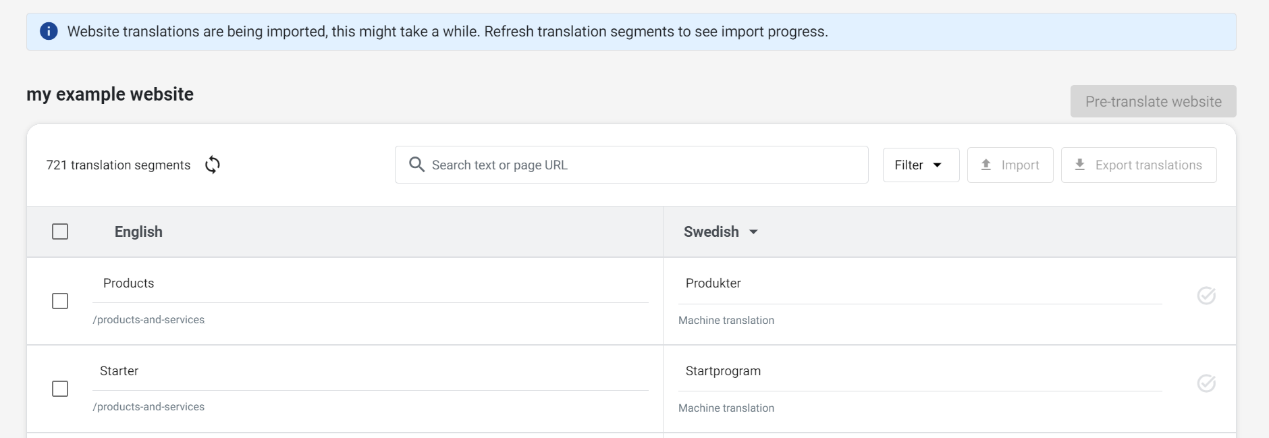
- An import notice will be displayed while the process is ongoing. You can refresh the translation editor table to view the imported segments.
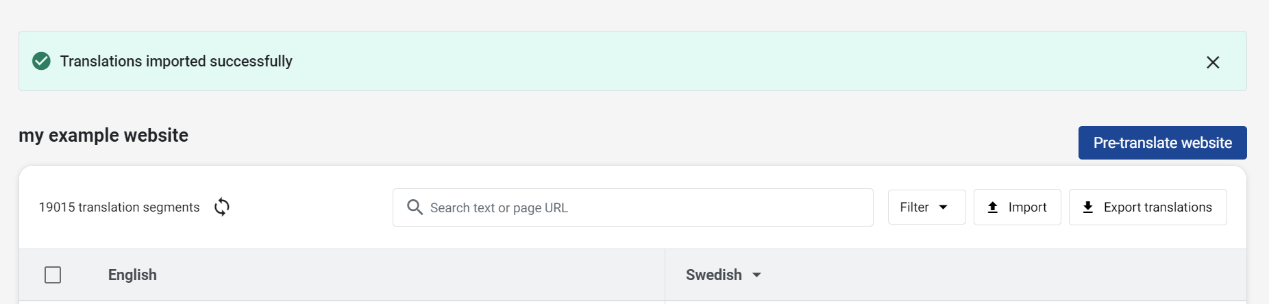
- Once import is completed success message will be displayed.
FAQ
How do I integrate Website translator into my website?
See: Website translator integration.
Can I customize the language selector look?
See: Setup language selector or Use a custom language.
Do I have to use the default language selector?
The website translator can be integrated with a custom language selector that fits your website’s design. Set the layout mode to null WebsiteTranslator.Options.ui.layout=null and implement the selector yourself.
Can I customize the translation notice?
See: Change display position and Hide translation progress.
Can I use machine translation alongside existing human translation?
If your website is already translated into several languages, you can define them as “third party languages” in configuration. When selecting either of them the website translator will not try to machine translate the content.
See: Integrate in an already multilingual.
I want to keep some parts untranslated / Some of my content is in another language.
Content that should not be translated, like addresses, lists of company names etc. should be marked as untranslatable. Add translate="no" attribute to the elements.
Content that is in a different language should be marked with a language attribute. If you don't mark this content as not translatable or different language the Website Translator will attempt to translate it and corrupt the content. Translation from several source languages at once is not supported.
I want to explicitly mark the content that should be translated.
Mark the elements that should be translated with translate=”yes” and add WebsiteTranslator.Options.translation.translateOnlyAllowedTags=true option to the configuration. No other content will be translated. If some child elements should not be translated mark them with translate=”no”.
| <html lang="en"> <head> <script type="text/javascript" src="https://unpkg.com/@tilde-nlp/website-translator/dist/widget.js"></script> </head> <body> <div class="website-translator"></div> <!-- This will be translated because it inherits document language "en"--> <p>This will be translated</p> <!-- This will not be translated because it has translate="no" attribute--> <p translate="no">This will not be translated</p> <!-- This will not be translated because it has different language from document source language --> <p lang='ja'>これを訳して</p> <ul translate="no"> <!-- This will not be translated because it inherits translate="no" attribute--> <li>Coffee</li> <!-- This will be translated because it overrides inherited translate="no" with translate="yes"--> <li translate="yes">Tea</li> <!-- This will not be translated because it inherits translate="no" attribute--> <li>Milk</li> </ul> </body> <footer> <script> // Configure plugin // 👇 Change XXXXXXXXXXX to your Client-ID WebsiteTranslator.Options.api.clientId = "XXXXXXXXXXX"; // 👇 Change XXXXXXXXXXX to your Translation Hub URL WebsiteTranslator.Options.api.url = "XXXXXXXXXXX"; WebsiteTranslator.Options.ui.toolbarPosition = "top" WebsiteTranslator.Initialize() </script> </footer> </html> |
I want the translation progress bar to not be visible to the website visitors.
Add WebsiteTranslator.Options.ui.headless=true option to the configuration. Website visitors won’t see the translation progress bar and be able to revert the page to the original language by clicking the restore link.
How can I edit the translations?
Translations can be edited on the Translation Hub. See: Pre-translate website content
The website translator will crawl your website to obtain a list of URLs for translation. It will then automatically translate these URLs into the selected languages. Please ensure that your website is publicly accessible, or accessible from the same internal environment as the Translation Hub. The translation speed may vary depending on the load of the translation engine and the translation provider.
Dynamic content, menus, and popups are not pre-translated. To translate such content, navigate to the desired page of your website, manually select the language from the language switcher, and then open the menu, popup, form, etc.
To pre-translate a website:
- Open the “Translation editor” and click “Pre-translate website”.
- Select the website domain from the dropdown.
- Choose the desired language(s).
- Click “Start pre-translation”.
- A pre-translation notice will be displayed while the process is ongoing. You can refresh the translation editor table to view the translated segments.
- Once pre-translation is completed success message will be displayed.
- Upon completion of the pre-translation, a success message will be displayed.
If pre-translation can’t access your website an error will be displayed:
Manage translations
Does the plugin translate images and media content?
The widget does not translate images or media content.
Will the edit I made in one page affect the translations of the whole website?
Edits are made on a segment basis. You will be able to change the translation of a whole sentence or paragraph not a single word in a sentence. If the same segment appears elsewhere on your website, it will use the edited translation. If there are any changes in the segment it will have to be edited and approved separately. For example, editing a translation of an element in a menu or footer will affect all the pages it appears in, but changing the translation of a street name that appears in different sentences will affect only the identical sentences.
Will the translation edits I made in my test environment be used in production?
Yes, if you have used the same Website translator integration. If you want to keep the translations separate generate Website translator for each of the environments.
I want to add or change languages, or MT engines.
You can change or add new languages and domains in the Settings of each integration. On the Translation Hub open My integrations and find the correct integration, then click Settings.
How to update translations after changing translation engine?
To update the existing translations after changing the machine translation engine or translation provider:
- Delete the old translations for the specific language.
- Translate all content again.
Troubleshooting
I can't find some of my page content in the Translation editor
Make sure you open/view all the menus, forms and other dynamic content when translating your web page otherwise they won't be translated and saved to the database for editing. Wait for the translation to finish before closing the page.
How to enable debugging for the plugin?
Set WebsiteTranslator.Options.debug=true in JavaScript integration code.
The language selector is not displayed
Make sure you have added an element with class="website-translator" to your page.
My website is not being translated
1. The language is not set
Check if the language is declared correctly in HTML. Your HTML should have lang attribute defined. Website translator supports ISO 639-1 language codes with optional ISO 3166-1 alpha-2 country codes.
2. The contents have not been loaded
Make sure the contents of the page have been loaded before initializing the website translator. Different methods can be used to determine if the page has been loaded.
| $(document).ready(function() { ... WebsiteTranslator.Initialize() }) |
For static websites it is recommended to place the Website translator configuration script at the end of the body tag.
Language of the Website translator’s UI keeps changing
The language of the translation bar and popups is set to the language you are translating into.
If you want them to be in the website’s original language, add the following line to the JavaScript integration code:
| WebsiteTranslator.Options.ui.translate="source" |
Website translation is slow / Translation makes the page load slower
First time the content of any page is loaded it will take some time to translate it. The translation will be saved in a translation database and will load faster the next time.
To make it load faster for the visitors it is recommended to "pre-translate" all the pages of your website. Go through pages, selecting each language from the Website translator's language selector to translate them.
Translation timed out
Waiting for the response from the translation engine took too much time. You can retry translating later.
The Website translator doesn’t look right
Globally set CSS styles can affect the appearance of the website translator. You can restyle it with CSS and fix the issues.